
| [<--] [Cover] [Table of Contents] [Concept Index] [Program Index] [-->] |
Debian: `xserver-common'
WWW: http://www.xfree86.org/
The X Window System, commonly called "X,"(13) is a
graphical windowing interface that comes with all popular Linux
distributions. X is available for many Unix-based operating systems; the
version of X that runs on Linux systems with x86-based CPUs is called
"XFree86." The current version of X is 11, Revision 6 -- or "X11R6."
All the command-line tools and most of the applications that you can run in the console can run in X; also available are numerous applications written specifically for X.
This chapter shows you how to get around in X: how to start it and stop it, run programs within it, manipulate windows, and customize X to your liking. See The Linux XFree86 HOWTO for information on installing X (see Reading System Documentation and Help Files).
WWW: http://www.afterstep.org/
WWW: http://www.fvwm.org/
WWW: http://www.windowmaker.org/
WWW: http://www.gnome.org/
WWW: http://www.kde.org/
When you start X, you should see a mouse pointer appear on the screen as
a large, black "X." If your X is configured to start any tools or
applications, they should each start and appear in individual windows. A
typical X session looks like this:
The root window is the background behind all of the other windows. It is usually set to a color, but you can change it (see Changing the Root Window Parameters). Each program or application in X runs in its own window. Each window has a decorative border on all four sides, called the window border; L-shaped corners, called frames; a top window bar, called the title bar, which displays the name of the window; and several title bar buttons on the left and right sides of the title bar (described in Manipulating X Client Windows).
The entire visible work area, including the root window and any other windows, is called the desktop. The box in the lower right-hand corner, called the pager, allows you to move about a large desktop (see Moving around the Desktop).
A window manager controls the way windows look and are displayed -- the window dressing, as it were -- and can provide some additional menu or program management capabilities. There are many different window managers to choose from, with a variety of features and capabilities. (See Choosing a Window Manager, for help in choosing a window manager that's right for you.)
Window managers typically allow you to customize the colors and borders
that are used to display a window, as well as the type and location of
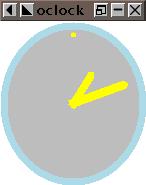
buttons that appear on the window (see Running a Program in X). For example, in the image above, the clock image itself is the
oclock program; the blue outline around it is the window border,
as drawn by the fvwm2 window manager. With the afterstep
window manager, the window border would look quite different:
There are many window managers you can choose from, all different;
instead of describing only one, or describing all of them only
superficially, this chapter shows the basics of X, which are
common to all window managers. I try to make no assumptions as to which
window manager you are using; while the fvwm family of window
managers has long been a popular choice on most Linux-based systems,
today other window managers -- including WindowMaker (the binary itself
is called wmaker), Enlightenment, AfterStep, and others -- have all
gained in popularity.
And recently, desktop environments have become popular. These are a collection of applications that run on top of the window manager (and X), with the purpose of giving your X session a standardized "look and feel"; these suites normally come with a few basic tools such as clocks and file managers. The two popular ones are GNOME and KDE, and while they generate a lot of press these days because of their graphical nature, both are changing very quickly and at the time of this writing are not yet ready for widespread, general use (and they can cause your system to crash).
If you have a recent Linux distribution and chose the default install,
chances are good that you have either GNOME or KDE installed, with
either the fvwm2 or wmaker window manager assigned as the
default. (While you can have more than one window manager installed on
your system, you can only run one at a time.)
There are two ways to start X. Some systems run the X Display Manager,
xdm, when the system boots, at which point a graphical xdm
login screen appears; you can use this to log in directly to an X
session. On systems not running xdm, the virtual console reserved
for X will be blank until you start X by running the startx
command.
$ startx [RET]
startx and redirect its output to a log file, type:
$ startx >$HOME/startx.log 2>&1 [RET]
Both of these examples start X on the seventh virtual console,
regardless of which console you are at when you run the command -- your
console switches to X automatically. You can always switch to another
console during your X session (see Console Basics). The
second example writes any error messages or output of startx to a
file called `startx.log' in your home directory.
On some systems, X starts with 8-bit color depth by default. Use
startx with the special `-bpp' option to specify the color
depth. Follow the option with a number indicating the color depth to
use, and precede the option with two hyphen characters (`--'),
which tells startx to pass the options which follow it to the X
server itself.
$ startx -- -bpp 16 [RET]
NOTE: If your system runs xdm, you can always switch to
the seventh virtual console (or whichever console xdm is running
on), and then log in at the xdm login screen.
To end an X session, you normally choose an exit X option from a
menu in your window manager.
fvwm2 window
manager, click the left mouse button in the root window to pull up the
start menu, and then choose Really quit? from the Exit
Fvwm submenu.
afterstep window
manager, click the left mouse button in the root window to pull up the
start menu, and then choose Really quit? from the Exit
Fvwm submenu.
If you started your X session with startx, these commands will
return you to a shell prompt in the virtual console where the command
was typed. If, on the other hand, you started your X session by logging
in to xdm on the seventh virtual console, you will be logged out
of the X session and the xdm login screen will appear; you can
then switch to another virtual console or log in to X again.
To exit X immediately and terminate all X processes, press the [CTRL]-[ALT]-[BKSP] combination (if your keyboard has two [ALT] and [CTRL] keys, press the left ones). You'll lose any unsaved application data, but this is useful when you cannot exit your X session normally -- in the case of a system freeze or other problem.
[CTRL]-[ALT]-[BKSP]
Programs running in an X session are called X clients. (The X
Window System itself is called the X server). To run a program in
X, you start it as an X client -- either by selecting it from a menu, or
by typing the command to run in an xterm shell window
(see Running a Shell in X). Most window managers have a
"start menu" of some kind; it's usually accessed by clicking the left
mouse button anywhere on the root window. To run an X client from the
start menu, click the left mouse button to select the client's name from
the submenus.
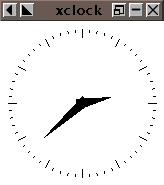
For example, to start a square-shaped, analog-face clock from the start
menu, click the left mouse button on the root window to make the menu
appear, and click the left mouse button through the application menus
and on `Xclock (analog)'. This starts the xclock client,
specifying the option to display an analog face:
You can also start a client by running it from a shell window -- useful for starting a client that isn't on the menu, or for when you want to specify options or arguments. When you run an X client from a shell window, it opens in its own window; run the client in the background to free the shell prompt in the shell window (see Putting a Job in the Background).
$ xclock -digital & [RET]
This command runs xclock in the background from a shell
window; the `digital' option specifies a digital
clock.
The following sections explain how to specify certain command-line options common to most X clients -- such as window layout, colors, and fonts.
Specify a window's size and location by giving its window geometry with the `geometry' option. Four fields control the width and height of the windows, and the window's distance ("offset") from the edge of the screen. It is specified in the form:
-geometry WIDTHxHEIGHT+XOFF+YOFF
The values in these four fields are usually given in pixels, although
some applications measure WIDTH and HEIGHT in characters.
While you must give these values in order, you can omit either pair.
For example, to specify just the size of the window, give values for
WIDTH and HEIGHT only.
xclock, 48 pixels wide and 48 pixels high, type:
$ xclock -geometry 48x48 [RET]
xclock, 480 pixels wide and 500 pixels high,
type:
$ xclock -geometry 480x500 [RET]
xclock with a width of 48 pixels and the default
height, type:
$ xclock -geometry 48 [RET]
xclock with a height of 48 pixels and the default
width, type:
$ xclock -geometry x48 [RET]
You can give positive or negative numbers for the XOFF and
YOFF fields. Positive XOFF values specify a position from
the left of the screen; negative values specify a position from the
right. If YOFF is positive, it specifies a position from the top
of the screen; if negative, it specifies a position from the bottom of
the screen. When giving these offsets, you must specify values for both
XOFF and YOFF.
To place the window in one of the four corners of the desktop, use
zeroes for the appropriate XOFF and YOFF values, as
follows:
| XOFF AND YOFF VALUES | WINDOW POSITION |
+0+0 |
Upper left corner. |
+0-0 |
Lower left corner. |
-0+0 |
Upper right corner. |
-0-0 |
Lower right corner. |
xclock in the lower left-hand corner,
type:
$ xclock -geometry +0-0 [RET]
xclock with a width of 120 pixels, a height of 100
pixels, an x offset of 250 pixels from the right side of the screen, and
a y offset of 25 pixels from the top of the screen, type:
$ xclock -geometry 120x100-250+25 [RET]
The window colors available in your X session depend on your display
hardware and the X server that is running. The xcolors tool will
show all colors available on your X server and the names used to specify
them. (Color names are not case sensitive.)
$ xcolors [RET]
Press [Q] to exit xcolors.
To specify a color to use for the window background, window border, and text or graphics in the window itself, give the color name as an argument to the appropriate option: `-bg' for background color, `-bd' for window border color, and `-fg' for foreground color.
xclock with a light blue window background, type:
$ xclock -bg lightblue [RET]
You can specify any combination of these attributes.
xclock with a sea green window background and a
turquoise window foreground, type:
$ xclock -bg seagreen -fg turquoise [RET]
To get an X font name, use xfontsel (see X Fonts).
To specify a font for use in a window, use the `-fn' option
followed by the X font name to use.
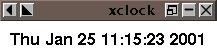
xclock with a digital display, and specify that it
use a 17-point Helvetica font for text, type:
$ xclock -digital -fn -*-helvetica-*-r-*-*-17-*-*-*-*-*-*-* [RET]
This command starts an xclock that looks like this:
NOTE: If you specify the font for a shell window, you can resize it after it's running, as described in Resizing the Xterm Font.
X applications often have up to three special menus with options for changing certain attributes. To see these menus, hold [CTRL] and click one of the three mouse buttons.(14) The following table lists and describes various window attributes common to most X-aware applications.
| WINDOW OPTIONS | DESCRIPTION |
-bd color |
Use color for the window border color. |
| -bg color -background color |
Use color for the window background color. |
| -bw number -borderwidth number |
Specify the window border width in pixels. |
| -fg color -foreground color |
Use color for the window foreground text or graphics. |
| -fn font -font font |
Use font for the font to use. |
| -geometry geometry | Specify window geometry. |
| -iconic | Immediately iconify the program (see Minimizing a Window). |
| -title string | Use string for the window title. |
Only one X client can accept keyboard and mouse input at a time, and that client is called the active client. To make a client active, move the mouse over the client's window. When a client is the active client, it is said to be "in focus." Depending on the window manager, the shape of the mouse pointer may change, or the window border and title bar of the active client may be different (a common default is steel blue for the active client color and gray for all other windows).
Each window has its own set of controls to manipulate that window. Here's how to perform basic window operations with the mouse.
To move a window, click and hold the left mouse button on the window's title bar, then drag its window outline to a new position. When the outline is in place, release the left mouse button, and the window will move to the position held by the window outline.
To resize a window, click and hold the left mouse button on any one of the window's four frames, and move the mouse to shrink or grow the window outline. Release the left mouse button to resize the window to the size of the window outline.
To destroy a window and stop the program it displays, click the left mouse button on the `X' button in the upper right-hand corner of the title bar. This is useful for when the program running in the window has stopped responding. (Of course, if a program in a window has an option to stop it normally, you can always use it to stop the program and close its window.)
To minimize a window, so that it disappears and an icon representing the running program is placed on the desktop, click the left mouse button on the `_' button in the upper right-hand corner of the title bar. This is also called iconifying a window.
To maximize an icon to a window (or "deiconify" it), double-click the left mouse button on the icon name, directly beneath the icon itself. The icon will disappear and the window will return to its prior position.
Many window managers (including afterstep and fvwm2) allow
you to use a virtual desktop, which lets you use more screen space
than your monitor can display at one time. A virtual desktop can be
larger than the display, in which case you can scroll though it with the
mouse. The view which fills the display is called the
viewport. When you move the mouse off the screen in a direction
where the current (virtual) desktop extends, the view scrolls in that
direction. Virtual desktops are useful for running many clients full
screen at once, each in its own separate desktop.
Some configurations disallow scrolling between desktops; in that case, switch between them with a pager, which shows a miniature view of your virtual desktop, and allows you to switch between desktops. It is a sticky window (it "sticks to the glass" above all other windows), and is always in the lower right-hand corner of your screen, even when you scroll across a virtual desktop. Both your current desktop and active X client are highlighted in the pager.
The default fvwm2 virtual desktop size is nine desktops in a 3x3
grid:

In the preceding illustration, the current desktop is the second one in the top row. The first desktop contains two X client windows -- a small one and a large one -- but there are no windows in any other desktop (including the current one).
To switch to another desktop, click the left mouse button on its
corresponding view in the pager, or use a keyboard shortcut. In
fvwm2, the default keys for switching between desktops are
[ALT] in conjunction with the arrow keys; in afterstep, use
the [CTRL] key in place of [ALT].
fvw2, type [ALT]-[{←]}.
afterstep, type
[CTRL]-[{←]}.
Use xterm to run a shell in a window. You can run commands in an
xterm window just as you would in a virtual console; a shell in
an xterm acts the same as a shell in a virtual console
(see The Shell).
Unlike a shell in a console, you can cut and paste text from an
xterm to another X client (see Selecting Text).
To scroll through text that has scrolled past the top of the screen, type [Shift]-[PgUp]. The number of lines you can scroll back to depends on the value of the scrollback buffer, specified with the `-sl' option; its default value is 64.
There are many options for controlling xterm's emulation
characteristics; consult the xterm man page for a complete
listing (see Reading a Page from the System Manual).
NOTE: xterm is probably the most popular terminal
emulator X client, but it is not the only one; others to choose from
include wterm and rxvt, all with their own special
features -- try them all to find one you like.
There are some aspects of X that people usually want to configure right away. This section discusses some of the most popular, including changing the video mode, automatically running clients at startup, and choosing a window manager. You'll find more information on this subject in both The X Window User HOWTO and The Configuration HOWTO (for how to read them, see Reading System Documentation and Help Files).
A video mode is a display resolution, given in pixels, such as 640x480. An X server can switch between the video modes allowed by your hardware and set up by the administrator; it is not uncommon for a machine running X to offer several video modes, so that 640x480, 800x600, and 1024x768 display resolutions are possible.
To switch to another video mode, use the [+] and [-] keys on the numeric keypad with the left [CTRL] and [ALT] keys. The [+] key switches to the next mode with a lower resolution, and the [-] key switches to the next mode with a higher resolution.
[CTRL]-[ALT]-[+]
[CTRL]-[ALT]-[-]
Type either of the above key combinations repeatedly to cycle through all available modes.
NOTE: For more information on video modes, see The XFree86 Video Timings HOWTO (see Reading System Documentation and Help Files).
The `.xsession' file, a hidden file in your home directory, specifies the clients that are automatically run when your X session first starts ("hidden" files are explained in Files and Directories). It is just a shell script, usually containing a list of clients to run. You can edit your `.xsession' file in a text editor, and if this file doesn't exist, you can create it.
Clients start in the order in which they are listed, and the last line
should specify the window manager to use. The following example
`.xsession' file starts an xterm with a black background and
white text, puts an `oclock' (a round clock) window in the upper
left-hand corner, starts the Emacs text editor, and then starts the
fvwm2 window manager:
#! /bin/sh
#
# A sample .xsession file.

xterm -bg black -fg white &
oclock -geometry +0+0 &
emacs &
exec /usr/bin/X11/fvwm2
All clients start as background jobs, with the exception of the window manager on the last line, because when this file runs, the X session is running in the foreground (see Managing Jobs). Always put an ampersand (`&') character at the end of any command line you put in your `.xsession' file, except for the line giving the window manager on the last line.
By default, the root window background is painted gray with a weaved
pattern. To draw these patterns, X tiles the root window with a
bitmap, which is a black-and-white image stored in a special file
format. X comes with some bitmaps installed in the
`/usr/X11R6/include/bitmaps/' directory; the default bitmap file is
`root_weave' (you can make your own patterns with the bitmap
tool; see Interactive Image Editors and Tools).
Use xsetroot to change the color and bitmap pattern in the root
window.
To change the color, use the `-solid' option, and give the name of
the color to use as an argument. (Use xcolors to get a list of
possible color names; see Specifying Window Colors.)
$ xsetroot -solid blueviolet [RET]
To change the root window pattern, use the `-bitmap' option, and give the name of the bitmap file to use.
$ xsetroot -bitmap /usr/X11R6/include/bitmaps/star [RET]
When specifying a pattern, use the `-fg' and `-bg' options to specify the foreground and background colors.
$ xsetroot -fg slategray2 -bg black -bitmap
/usr/X11R6/include/bitmaps/star [RET]
Use xsetroot with the special `-gray' option to change the
root window to a shade of gray designed to be easy on the eyes, with no
pattern.
$ xsetroot -gray [RET]
NOTE: You can also put an image in the window (although this consumes memory that could be spared for a memory-hogging Web browser instead; but see Putting an Image in the Root Window, for how to do it).
Yes, there are many window managers to choose from. Some people
like the flashiness of Enlightenment, running with KDE or GNOME, while
others prefer the spartan wm2---the choice is yours.
The following table describes some of the more popular window managers currently available.
| WINDOW MANAGER | DESCRIPTION |
9wm |
9wm is a simple window manager inspired by AT&T's Plan 9 window
manager -- it does not use title bars or icons. It should appeal to those
who like the wily text editor (see Choosing the Perfect Text Editor).
Debian: `9wm' WWW: ftp://ftp.cs.su.oz.au/dhog/9wm/ |
afterstep |
AfterStep is inspired by the look and feel of the NeXTSTEP interface.
Debian: `afterstep' WWW: http://www.afterstep.org/ |
enlightenment |
Enlightenment is a graphics-intensive window manager that uses desktop
"themes" for decorating the various controls of the X session.
Debian: `enlightenment' WWW: http://www.enlightenment.org/ |
fvwm95 |
fvwm95 makes X look like a certain proprietary, corporate OS from
circa 1995.
Debian: `fvwm95' WWW: http://www.foxproject.org/xclass/fvwm95.html |
twm |
The Tab Window Manager is an older, simple window manager that is
available on almost every system. (It's also sometimes called Tom's
Window Manager, named after its primary author, Tom LaStrange.)
Debian: `twm' |
wm2 |
wm2 is a minimalist, configuration-free window manager.
Debian: `wm2' WWW: http://www.all-day-breakfast.com/wm2/ |
[<--] [Cover] [Table of Contents] [Concept Index] [Program Index] [-->]